February 11, 2026
·
12 min read
Set Up AI SEO Tools for Weekly Content
A step-by-step guide to setting up AI-powered SEO tooling for a reliable weekly content engine — map your stack and integrations, connect GSC/GA4 cleanly, configure keyword research and brief generation, and automate drafting, on-page checks, publishing, and reporting.

Your weekly content plan falls apart when tools don’t talk to each other: keywords live in one place, performance data in another, briefs get rebuilt from scratch, and drafts ship without consistent SEO checks.
This guide shows you how to wire an AI SEO stack that runs on a weekly cadence. You’ll map the workflow end to end, connect GSC and GA4 with sanity checks, standardize keyword scoring and intent validation, automate briefs and drafting with guardrails, and finish with publishing automation plus a reporting dashboard that proves what moved.
Tooling Stack Map
Your weekly SEO system works when each tool hands the next one clean inputs. Think “keyword list in, published URL out,” with tracking IDs attached. Example: a GSC query export becomes a brief, then a draft, then a labeled URL you can measure.
Weekly workflow stages
You need one repeatable path from idea to measurable outcome. Otherwise you ship content that feels busy but can’t be improved.
A clean weekly loop looks like this:
- Topic intake from sales, support, and GSC queries
- Keyword research to pick one primary and 3–5 supports
- Brief creation with intent, outline, and internal links
- Draft writing in your AI writer or doc tool
- On-page SEO pass for title, headers, schema, and links
- Publish in your CMS with canonical and indexing checks
- Rank tracking plus GSC/GA4 monitoring by URL
- Retrospective to decide “update, expand, or replace”
If you can’t name the stage you’re in, your stack is running you.
Required integrations
Your stack only scales when tools share identifiers like URL, keyword, and page type. Manual copy-paste works until it quietly breaks.
- Connect GSC for queries, pages, and indexing signals
- Connect GA4 for engagement and conversion events
- Connect your CMS for drafts, publishes, and URL capture
- Connect a keyword tool for volume and difficulty pulls
- Connect an AI writer for drafts tied to the brief
- Connect a rank tracker for keyword-to-URL mapping
- Connect Sheets or Notion for the “system of record”
- Connect Zapier or Make for routing and alerts
The goal is one source of truth, not eight half-truths.
Data flow diagram
Each week should produce a traceable chain from keyword to URL to results. You’re building provenance, not just pages.
- Create a keyword set in your keyword tool and label intent.
- Generate a brief in Sheets/Notion with target keyword and SERP notes.
- Produce the draft in the AI writer, linked back to the brief ID.
- Add metadata and internal links in the CMS before publishing.
- Capture the live URL in your tracker, then pull GSC/GA4 metrics into the report.
If the URL isn’t linked to a keyword and brief, you can’t debug performance.
Choose Core Tools
Pick one tool per job so your weekly workflow stays boring and repeatable. Your criteria are simple: it must integrate, export cleanly, and run the same way every week.
| Job | Core tool options | Selection criteria | Weekly output |
|---|---|---|---|
| Keyword research | Ahrefs, Semrush | API, CSV exports | Keyword cluster CSV |
| Content brief | Frase, Clearscope | Docs export, templates | Brief + outline |
| Drafting | ChatGPT, Claude | Saved prompts, files | Draft in Doc |
| On-page SEO | Surfer, NeuronWriter | GDocs/WordPress sync | Optimization checklist |
| Publishing + tracking | WordPress + GSC | Scheduled posts, API | URL list + metrics |
If a tool can’t export or plug in, it becomes a weekly bottleneck instead of a system.
Account Connections
Connect your data sources first, or your AI SEO tool will guess. Google Search Console and GA4 give it the “what happened” signals behind every recommendation. Example: a page that “should rank” might already be capped by indexing or broken tracking.
Connect Google Search Console
Pick the property type based on how you report and how your site is actually served.
- Choose Domain property for full coverage across protocols and subdomains.
- Use URL-prefix property for a single host or folder view.
- Verify ownership via DNS (Domain) or HTML file/tag (URL-prefix).
- Add users with least-privilege access, then test data visibility.
- Confirm the preferred canonical host matches your reporting view.
If your pages live across hosts, URL-prefix will quietly hide wins and losses.

Connect GA4
Give the tool clean access, then confirm the events you care about are real.
- Grant Viewer or Analyst access, then validate the property ID.
- Link GA4 to Search Console in Admin → Product links.
- Confirm key events are marked as conversions (signup, lead, purchase).
- Check event naming consistency across web and app streams.
- Validate attribution settings match your reporting expectations.
If conversions are mislabeled, your “best content” list will be confidently wrong.
Validate tracking sanity
Do a quick reality check before you trust any dashboard or automated brief. Look for the boring signals: pages indexed, sessions counted, and queries split the way your team talks.
Check four things: indexing coverage for key URLs, GA4 pageviews on new posts, consistent UTM rules, and branded vs non-branded queries showing up in GSC. A simple test helps: search your brand name and a core topic, then confirm both appear with plausible clicks.
Fix tracking first. Content decisions made on bad data are just expensive opinions.
Keyword Research Setup
You need one keyword system that runs every week, not a one-off scramble. The goal is simple: find repeatable opportunities and export them cleanly into your content briefs. Think of it like a conveyor belt, not a brainstorm. If you need a refresher on fundamentals before you standardize the process, see this SEO guide for keyword planning.
Seed list creation
Start with a seed list that’s bigger than your current blog plan. You’re building a reusable inventory you can mine weekly.
- Pull product terms from pricing pages, docs, and feature names.
- Add pain-point phrases from sales calls, tickets, and reviews.
- List competitor categories, headings, and recurring glossary terms.
- Export internal site search queries and high-exit help articles.
- Store everything in one master sheet with a “source” column.
If your seeds don’t have sources, you’ll chase vibes instead of demand.
SERP and intent checks
Before you score anything, decide what “intent” means in your org and how you’ll label it. A quick check of the SERP tells you whether Google wants a “how-to,” a list, a landing page, or a tool, and it shows the SERP features you must compete with.
Use a simple classification like: informational (“how to fix X”), commercial (“best X for Y”), transactional (“X pricing”), and navigational (“brand + feature”). Note the dominant content type (guide, template, comparison, product page) and capture SERP features like People Also Ask, featured snippets, video packs, and forums as requirements. Your sources are the SERP itself, People Also Ask expansions, and related searches at the bottom.
When the SERP disagrees with your planned format, the SERP wins.
Scoring rules
Scoring keeps weekly keyword picks consistent, even when different people run the process.
- Volume: 0–2 (0=<50, 1=50–200, 2=>200).
- Difficulty: 0–2 (2=low, 1=medium, 0=high).
- Business fit: 0–2 (2=core product, 1=adjacent, 0=irrelevant).
- Trend: 0–2 (2=rising, 1=flat, 0=declining).
- SERP volatility: 0–2 (2=stable, 1=mixed, 0=shifting).
Go/no-go: ship at 8+ total, review at 6–7, skip at 5 or less.
The threshold is your guardrail; it protects your calendar from “interesting” keywords.
Brief Generator Config
Your brief generator is the handoff between SEO data and human writing. Build it once, then let it turn a keyword into an outline, FAQs, and link targets in minutes. Think of it as your “one-page plan” that prevents vague drafts.
Brief template fields
Give the AI a fixed form to fill, so every brief is comparable week to week.
- Primary keyword and close variant
- Secondary keywords and entity list
- Search intent and audience snapshot
- H2 outline, FAQs, and examples
- CTA plus internal link targets
If a field is missing, your writer will invent it under pressure.
Prompt and guardrails
Your prompt should force evidence, structure, and voice, not “creativity.”
Write a prompt like this:
“Create an SEO content brief for: {primary keyword}. Use the provided secondary keywords and entities. Identify intent, audience, and angle. Produce a scannable H2/H3 outline, 5 FAQs with short answers, 3 concrete examples, and 5 internal link targets with suggested anchor text.
Guardrails: cite 3–5 reputable sources with URLs for any factual claims; if unsure, say ‘unknown’ and ask a clarifying question. Do not invent statistics, quotes, or product features. Match brand voice: {voice notes}. Suggest Article structured data and FAQ schema where applicable. Target word count: {min}-{max}. Output in this template: {brief template}.”
If the AI can’t say “unknown,” it will eventually say something wrong.
Automate brief creation
Use automation so briefs appear the same day keywords are approved.
- Trigger: new keyword row added in Sheets/Airtable.
- Action: send fields to your LLM to generate the brief.
- Action: save output to Notion/Google Docs in the right folder.
- Action: create an assignment with owner and due date.
- Action: notify Slack with the doc link.
Automation turns “we should write this” into a dated task with a link.
Content Drafting Pipeline
You need a drafting pipeline that keeps speed without sacrificing trust. The trick is simple: let AI draft structure and phrasing, then let SMEs lock accuracy and nuance.
Think of it like a relay race. AI runs the first lap fast, your SME runs the second lap clean.
Drafting workflow steps
Use the same workflow every week so quality stops depending on who’s writing. Your goal is a CMS-ready draft that already sounds like you.
- Import the brief, keywords, and outline into your drafting template.
- Generate section drafts with AI, one heading at a time.
- Insert real examples, numbers, screenshots, and mini case notes.
- Add product mentions where they fit, with one clear benefit each.
- Run SME review, then finalize in your CMS format.
If your SME is rewriting paragraphs, your prompts are too loose.
Voice and style presets
Without presets, every draft becomes a negotiation about tone. Write rules once, then reuse them in prompts, templates, and editor checklists.
Create a short “house style” block like: “Direct, plain English, no hype,” plus a reading level target and formatting rules. Add guardrails too, like forbidden claims (“#1,” “guaranteed”), link style (descriptive anchors), and image captions that explain context, not decoration.
Presets are how you scale voice, not how you police writers.
Fact-check checklist
AI drafts confidently, even when it’s wrong. Your checklist needs to force uncertainty into the open.
- Add citations for stats, benchmarks, and “industry standard” claims.
- Verify dates, version numbers, and feature availability.
- Confirm claims match the source wording, not your interpretation.
- Validate screenshots, UI labels, and workflows reflect current product.
- Check pricing and policy-sensitive topics for approval requirements.
If something is unknown, remove it or verify it. No third option.
On-Page SEO Toolkit
Your on-page toolkit should turn messy drafts into repeatable pages with predictable outcomes. Configure templates and checks so every post ships with clean metadata, purposeful internal links, and snippet-ready answers that sound like a human wrote them.
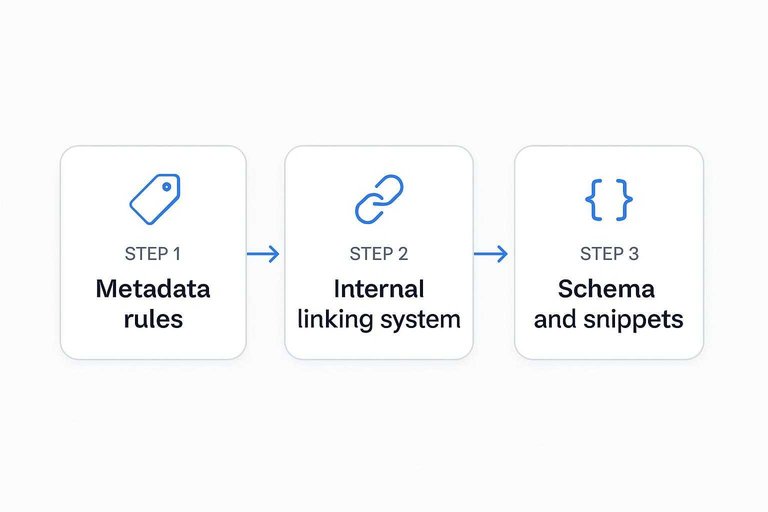
Metadata rules
Set rules once so your AI outputs don’t drift into “Ultimate Guide” spam or chopped keywords. Your goal is consistent formatting, fast relevance signals, and higher CTR without bait.
- Keep titles 50–60 characters, front-load the primary keyword
- Write meta descriptions 150–160 characters, add one concrete benefit
- Use one clear angle, avoid stacked synonyms and repeated words
- Include a qualifier, like “for SaaS” or “in 2026”
- Promise the page’s result, not a vague “everything you need”
If your title reads like a headline, not a label, you’ll win clicks without losing trust.
Internal linking system
Internal links work best as a system, not a last-minute sprinkle. Build a weekly loop that keeps hubs current and pushes authority to newer posts.
- Maintain a hub sheet with pillar URLs, subtopics, and target anchors.
- Choose anchors that match intent, not exact-match keywords every time.
- Add 3–5 related links per post, including one link to a pillar.
- Update 3–5 older posts weekly with links to your newest pages.
- Track changes in the hub sheet, including dates and added URLs.
When older posts point forward every week, your site starts compounding like a portfolio.
Schema and snippets
Add schema when it matches what the page actually delivers, not what you hope Google shows. Use Article schema by default, add FAQ schema when you have real question-and-answer sections, and use HowTo schema only for step-by-step tasks with clear outcomes.
For snippets, write one-sentence definitions that a beginner could quote, like “Topical authority is your site’s perceived expertise on a subject cluster.” Then add one tight list or short set of steps with consistent formatting and no filler.
If you structure the answer first, schema becomes an accelerator instead of a bandage.
Publishing Automation
You want approved drafts to land in your CMS fast, but not sloppy. Automation works when it enforces the same QA gates every time, like a checklist that can’t forget.
- Connect your content source to your CMS via API or webhook.
- Require an “Approved” status plus required fields before publishing.
- Run pre-publish QA checks for links, images, metadata, and schema (see essential content automation resources).
- Create a staging preview and assign a final human spot-check task.
- Publish, then log the URL and ping Search Console.
Automate the handoff, not the judgment, and your weekly cadence won’t drift.
Weekly Reporting Dashboard
You need one place that answers one question: “What did we ship, and what did it do?” Tie each URL you published to impressions, clicks, rankings, and conversions so you can spot winners fast.
Use this weekly snapshot table as your dashboard.
| Metric | Source | Weekly view | Action trigger |
|---|---|---|---|
| URLs shipped | CMS / Sheet | New + updated | Missed cadence |
| Impressions | GSC | Δ vs last week | Topic demand shift |
| Clicks / CTR | GSC | Δ + outliers | Rewrite titles |
| Avg position | GSC | Top movers | Improve on-page |
| Conversions | GA4 | Leads / revenue | Expand winners |
If the table can’t tell you what to do next, it’s not a dashboard yet.
Tool Governance (Permissions, Privacy, and AI Policy)
Weekly systems break when access gets messy, prompts drift, or sensitive data leaks into the wrong tool. Put simple guardrails in place so your ai seo tools stay reliable as more people touch the workflow.
Permissions and least-privilege roles
Treat your stack like production infrastructure, even if it’s “just content.”
- Create roles: Admin (setup), Operator (weekly runs), Reviewer (SME/SEO), Read-only (stakeholders).
- Restrict publishing access to a small group; everyone else writes in drafts.
- Use separate service accounts/API keys for automations so ownership doesn’t disappear when someone leaves.
- Review connected accounts quarterly: remove unused integrations, rotate keys, and confirm who can export data.
If a tool can publish, it can also publish mistakes.
Data hygiene for AI inputs
Most AI failures in SEO ops come from bad inputs: outdated briefs, mixed versions, or confidential data in the wrong place.
- Define what can enter prompts: public pages, approved positioning, sanitized analytics exports.
- Define what cannot: customer names, private tickets, internal revenue numbers, unannounced roadmap details.
- Store a “prompt pack” in your system of record (Sheets/Notion) with versioning: prompt name, owner, last edited, and what changed.
- Add a required “source links” field in briefs so writers can verify facts without guessing.
If inputs aren’t controlled, outputs can’t be trusted.
Disclosure and editorial standards
AI-assisted drafting is fine. Unverifiable claims are not.
- Decide your internal policy: when AI is allowed (drafting, outlining) and where it’s not (legal, medical, financial claims without review).
- Require human sign-off for factual sections, comparisons, and any claim that could be interpreted as a guarantee.
- Standardize citations: any statistic, benchmark, or “best practice” claim must have a source link or be removed.
- Keep a lightweight audit trail: brief ID → draft doc link → final URL → reviewer initials.
The goal isn’t bureaucracy. It’s making sure your weekly output stays publishable as you scale.
Launch the stack, then lock in the weekly cadence
- Build your stack map and confirm every workflow stage has an owner, an input, and an output.
- Connect GSC and GA4, then validate tracking sanity before you automate anything downstream.
- Configure keyword scoring + intent checks, generate briefs from a fixed template, and bake in voice/fact-check guardrails for drafting.
- Turn on on-page rules, publishing automation, and the weekly dashboard—then run one full week as a pilot and tighten prompts, thresholds, and alerts based on what broke.
Frequently Asked Questions
- Do AI SEO tools still help in 2026 with Google’s AI Overviews and zero-click results?
- Yes—AI SEO tools often help by finding query clusters, optimizing for snippet/overview-friendly formats, and improving internal linking so you win more impressions and assisted conversions even when clicks drop.
- How do I measure ROI from AI SEO tools beyond rankings?
- Track incremental organic conversions and revenue in GA4 plus Search Console clicks/impressions, then compare content cohorts (AI-assisted vs. baseline) over 8–12 weeks to isolate lift.
- How long does it take to see results after setting up AI SEO tools for weekly content?
- Most sites see early leading indicators in 2–4 weeks (indexation, impressions, top-50 rankings) and more reliable growth in 8–12 weeks as more pages accumulate data.
- Can I use ChatGPT or Claude instead of paid AI SEO tools?
- You can handle briefs and drafts with ChatGPT/Claude, but you’ll usually still need dedicated SEO data sources (Google Search Console, keyword databases, crawlers) to prioritize topics and validate impact.
- Should I use AI SEO tools on every page, or only for new content?
- Use them for new content and for updates on pages with existing impressions but low CTR or rankings in positions 5–20, since those often produce the fastest wins with the least effort.
Automate Your Weekly SEO Engine
Building an AI SEO tool stack is only half the work—keeping keyword research, briefs, drafting, publishing, and reporting running weekly is where most teams stall.
Skribra turns that workflow into a consistent pipeline with SEO-optimized articles, WordPress publishing, images, and integrations—plus a backlink exchange network; start with the 3-Day Free Trial.
Written by
Skribra
This article was crafted with AI-powered content generation. Skribra creates SEO-optimized articles that rank.
Share: