September 19, 2026
·
9 min read
Google Webmaster Console Setup: Property Scope, Verification, Access
Set up Google Webmaster Console (Search Console): choose Domain vs URL-prefix, use durable verification, add users, submit a sitemap, and link GA4.

You’re trying to make sure a site is showing up in search—and to keep the right people able to troubleshoot it later. The easy setup gets you “something connected,” but it can also leave you with missing coverage, broken access after a redesign, or alerts going to the wrong inbox.
This guide walks you through nine best-practice steps in Google Search Console: picking the right property scope, choosing a verification method that won’t silently break, submitting your sitemap, doing a first-pass URL inspection, and setting roles, integrations, and platform-property expectations so your setup holds up for clients and teams.
What It Is
Old name, now
Google Search Console is what many people still mean when they say “google webmaster console.” Google renamed Google Webmaster Tools to Google Search Console on May 20, 2015, but the old name stuck in agency docs, tutorials, and client requests. (See Google’s announcement: renamed Google Search Console.)
Free, diagnostic tool
Search Console is a free Google service for monitoring and troubleshooting how your site shows up in Google Search—think visibility, indexing signals, and the kind of diagnostics you use when pages don’t appear or performance drops. You don’t have to set it up for your site to be included in Google Search results, so “registering” a site isn’t a prerequisite for indexing.
Setup is still worth doing because it’s the place Google surfaces site-specific issues and search data you can’t reliably infer elsewhere. To open it, sign in with your Google account at Google Search Console and add your site as a property (a single Search Console account can have up to 1,000 properties). Data starts collecting as soon as a property is added—even before verification—but it typically takes a few days before you’ll see data in reports.
Pick Property Type
In Google Search Console (aka “google webmaster console”), a property is the named asset you add so Search Console can group reports and tools for a site.
Google supports two website property types, and the choice determines what data you’ll see and what access you need to verify it.
| Property type | Coverage you get | Verification you must control | Pick it when |
|---|---|---|---|
| Domain property (covers all protocols + subdomains) | Everything on the domain across subdomains and protocols (http/https/ftp) | DNS record only (TXT or CNAME) | You want full coverage and someone on your team/client side can edit DNS |
| URL-prefix property (covers one exact prefix) | Only URLs that start with the exact prefix, including protocol (and optionally a path) | Can be verified without DNS (for example, via an HTML file on the site) | You can’t touch DNS, or you only need one specific host/protocol/path |
Google’s Search Console team has explicitly said they recommend using domain properties where possible going forward (see: domain-wide data in Search Console).
If you’re working on a client site, this boils down to one question: can you (or the client) make a DNS change? If yes, start with a Domain property; if not, use a URL-prefix property and plan to add the Domain property later when DNS access is available.
Choose Verification Method
Your verification method is an operational choice, not a one-time hurdle. A verification token—the thing you place on your site/DNS/account to prove ownership, and that only works while Google can still confirm it’s there—should be something you can keep in place through redesigns, CMS changes, and handoffs.
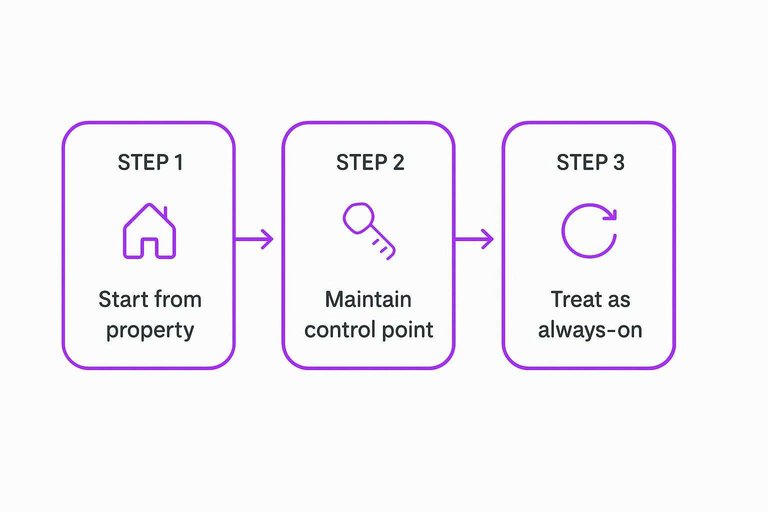
- Start from the property you created. If it’s a Domain property, you’re committing to DNS verification; if it’s a URL-prefix property, you can use a site-level method (like an HTML file).
- Confirm you can maintain the control point. DNS verification means you (or your client) can edit DNS records; site-file verification means you can reliably keep a specific file live on the site.
- For DNS verification, plan for propagation time. A manually installed DNS verification record can take time before your provider starts serving it.
- For HTML file verification, place it exactly where Google expects. Keep the verification file accessible; removing it breaks verification. If verification fails unexpectedly, check your server logs for requests to that file from the Google Site Verifier user agent.
- Treat verification as “always-on.” Search Console periodically re-checks tokens; if it can’t confirm yours and it isn’t fixed, permissions expire after a grace period—and if all verified owners lose access, every user loses access too.
(Reference: Verify your site ownership.)
Make Verification Durable
Verification isn’t “done” when it turns green once in google webmaster console. Treat it like a control you must be able to re-prove after every deploy, redesign, or handoff.
- Create a two-owner baseline. In Users and permissions, make sure there are at least two Verified owners (owners who can prove ownership with a still-valid token), not just one person’s login.
- Add a backup owner without touching the token. If you already have one verified owner, add a Delegated owner (an owner granted by an existing owner, without placing a new token) so access survives staffing changes.
- Don’t rely on email groups for continuity. Search Console requires a valid Google Account for each user, and you can’t add an email group as a user—so assign ownership to real, maintained accounts.
- Tie the token to your change process. Whatever your method, add a release gate: “is the verification token still present at the control point (DNS record / file / tag)?”
- Audit the breakpoints. Any change that removes or replaces the token breaks verification—so re-check right after DNS edits, CMS/theme swaps, tag/container changes, and migrations.
If you only have one verified owner, you don’t have durable access—you have a single point of failure. (See: Managing owners, users, and permissions.)
Submit Your Sitemaps
-
Get the sitemap URL(s) you want Google to use. You’re submitting a URL, not uploading a file—so you need the exact address (for example, a standard XML sitemap endpoint your CMS generates). If you need a refresher on sitemap basics and best practices, see this SEO guide for sitemaps.
-
Submit it in the Sitemaps report. The Sitemaps report—the Search Console report where you submit a sitemap URL and monitor Google’s processing/errors—only accepts submissions from an owner, and it only lists sitemaps submitted there (or via the Search Console API), not ones Google happened to discover elsewhere. The report can show up to 1,000 submitted sitemap requests. (Docs: Sitemaps report.)
-
Watch “Success” vs errors and fix the input, not the symptom. If processing fails, treat it like a build break: correct the sitemap URL, format, or accessibility issue, then re-submit and re-check until it processes cleanly.
-
Handle large sites with splitting + an index. A single sitemap file is limited to 50,000 URLs and 50MB uncompressed. When you exceed that, use a sitemap index file—an XML file that lists multiple sitemap files—then submit the index. Search Console lets you submit up to 500 sitemap index files per site.
-
Spot-check key URLs with URL Inspection. Use the URL Inspection tool to see what Google knows about a specific page and, when appropriate, use Request indexing. Quotas exist: Google doesn’t publish a fixed UI number, but for the URL Inspection API it publishes a per-site quota of 2,000 queries per day.
Baseline URL Inspection
The URL Inspection tool is the Search Console view that shows what Google knows about one specific URL (its indexed view plus a live test), and it’s also where you can use Request indexing—with quotas.
- Pick a short “baseline set” of URLs. Choose your homepage, a key category/service page, and a recently published page.
- Inspect each URL and read the indexed view first. You’re confirming whether Google has an indexed version at all and whether the URL you care about is the one it’s tracking.
- Run a live test. This checks what Google can access right now, which helps separate “not indexed yet” from “can’t be crawled.”
- Request indexing only when you changed something. Use it after a meaningful fix or new publish; don’t treat it as a bulk submission tool.
- Respect the limits if you automate. The URL Inspection API has a per-site quota of 600 queries per minute (see: Search Console API usage limits).
Do this once after sitemap submission, then reuse the same workflow whenever a page won’t show up in search.

Set Roles and Integrations
Make this property survivable as a shared system, not “whoever set up google webmaster console last.”
-
Assign owners intentionally (and sparingly). A Verified owner is an owner who proves access by keeping a verification token valid; a Delegated owner is granted owner status by an existing owner without adding a token. Keep owners to the people who maintain DNS/site access and need to manage users.
-
Give day-to-day operators “user” access, not ownership. A Full user can use Search Console features without being an owner; a Restricted user has limited visibility. Give Full to SEO/dev operators who act on issues, and Restricted to stakeholders who only need reporting.
-
Link GA4 the right way (and with the right accounts). The integration links a Search Console website property to a GA4 web data stream—the GA4 object that collects website data for a GA property. Creating the link requires Editor access on the GA4 property and being a verified owner in Search Console, and it’s one-to-one between the stream and the Search Console property (see: Connect Search Console to Google Analytics).
-
If GA4 shows “no Search Console data,” check the order of operations. Data availability inside Analytics depends on whether site verification or stream creation happened first—so confirm you linked the correct stream/property pair.
-
Set email alerts per person, not per site. In Search Console Email Preferences, notifications are configured at the user level and apply across all properties; if someone turns email off, messages still appear in the Search Console message panel.
Once access is stable and GA4 is linked, Skribra can use Search Console performance signals as the feedback loop for maintaining and updating live posts based on what’s actually happening in Google Search—and you can pair that with resources to simplify SEO workflows to keep execution consistent across the team.
Platform Properties Note
If your “google webmaster console” UI doesn’t match a tutorial screenshot, it may be because Search Console now also supports platform properties—properties for non-website surfaces like Instagram, TikTok, X, and YouTube—and Google is rolling that feature out gradually, so not every account shows it yet.
This guide is still about website properties (Domain and URL-prefix): that’s what you use to verify a site, submit sitemaps, and troubleshoot indexing. If you do see platform options, treat them as separate from your website setup; once added, they also take a few days before data shows up in reports. (More: About platform properties.)
Lock down durable access first
Don’t treat Search Console as a quick “connect it and forget it” task—treat it as an operational control you’ll need to re-prove after every change. Start with the right scope (a Domain property when you can control DNS) and choose a verification token you can keep in place through redesigns, migrations, and tag/CMS swaps. Before you wire in sitemaps, GA4, and notifications, eliminate the single point of failure by ensuring ownership and permissions are set up to survive handoffs. Once access is durable, the Sitemaps report and a small, repeatable URL Inspection baseline become the workflow you rely on when a page doesn’t show up or performance drops.
Frequently Asked Questions
- Can I use Google Webmaster Console for free?
- Yes—Google Search Console (formerly Google Webmaster Tools) is free to use; you only need a Google account and a verified property to access reports.
- What is the new name for Google Webmaster Console?
- The current name is Google Search Console; “google webmaster console” is the older, still-commonly searched name for the same product.
- Is a Domain property the same as adding https://www.example.com in Google Webmaster Console?
- No—https://www.example.com is a URL-prefix property, while a Domain property covers the entire domain across protocols and subdomains; Search Console supports these two website property types.
- If I already verified a URL-prefix property, do I still need to add a Domain property in Google Webmaster Console?
- Add a Domain property when you want complete coverage across subdomains and protocols in a single property, even if you already have one or more URL-prefix properties verified.
- Why is Google Analytics 4 not showing any Search Console data after I link it?
- The GA4 integration is a Product link between Search Console and Google Analytics; confirm you linked the intended Search Console property to the correct GA4 web data stream and that you’re viewing the right property/stream pairing in GA4.
Turn Search Console into action
Once access and verification are stable, the real work is turning coverage and performance signals into a steady, prioritized publishing and update loop.
Skribra uses Search Console-driven maintenance to update live posts based on performance data while its strategy engine researches keywords, writes long-form articles, and publishes on a rolling 30-day content calendar—backed by a 3-Day Free Trial.
Written by
Skribra
This article was crafted with AI-powered content generation. Skribra creates SEO-optimized articles that rank.
Share: